Benutzer-Werkzeuge
Inhaltsverzeichnis
ITRA-SimConnect-Clients FS2020
Systembeschreibung
SimConnect ist eine von Microsoft entwickelte Schnittstelle zur Kommunikation externer Programme mit dem Flugsimulator. Der SimConnect-Server wird zusammen mit dem Flugsimulator installiert.
Das SimConnect-SDK realisiert den Zugriff auf die Simulationsvariablen und über die Event-IDs können Kommandos erzeugt werden. Dadurch ist es mit einem SimConnect-Client möglich, mit externer Hardware Kommandos an den Flugsimulator FS2020 zu senden, Variablen zu setzen und den Status von Variablen abzufragen und anzuzeigen.
Systemschema der SimConnect-Clients

Der SimConnect-Client kommuniziert direkt mit der Hardware über USB.
In MSFS2020 kann das SDK aus dem Entwicklermodus installiert werden.
https://www.fsdeveloper.com/forum/threads/2020-sdk-installation-instructions.448405/
System-Voraussetzungen
Für die USB-Geräte installieren Sie bitte die zugehörigen Treiber.
Die SimConnect-Clients sind mit dem SDK des MSFS2020 entwickelt worden.
Die SimConnect-Clients können direkt aus dem Installationsordner gestartet werden.
Der Standard-Speicherort der Konfigurations-Dateien der SimConnect-Clients ist:
Win10: C:\Users\Benutzername\AppData\Roaming\Sim&IT\SimConnect
Dieser Ordner ist standardmäßig versteckt.
Die Konfigurationsdateien ITRA-ActivePanel.cfg und ITRA_TFT1.cfg können sich auch im Installationsordner befinden, diese werden dann vorzugsweise genutzt.
Neben der Änderung mit den Konfigurations-Programmen können die Konfigurationsdateien z.B. mit dem Editor (Programme → Zubehör) angezeigt und bearbeitet werden. Einen entsprechender Link zu den Konfigurationsdateien wird bei der Installation im Programmordner erzeugt.
Hinweis: Falls die SimConnect-Clients auf Ihrem System mit einer Fehlermeldung starten, dann müssen auf Ihrem System die aktuellen Laufzeitbibliotheken für die Programmumgebung installiert werden. Diese finden Sie über die Microsoft Downloads.
Microsoft Visual C++ Redistributable Packages
Software-Installation
Nach dem Start des Setup können Sie den Zielordner der Installation und den Menü-Ordner der Programm-Gruppe ändern. Mit Fertigstellen ist die Client-Installation abgeschlossen.
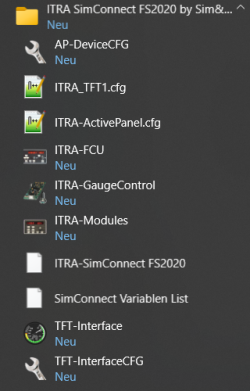
Nach der Installation finden Sie in der bei der Installation vorzugsweise angegebenen Programmgruppe ITRA SimConnect FS2020 by Sim&IT die Links zu den Client-Programmen, Programme für das Ändern der Konfigurationsvariablen der Clients und zu den beiden Konfigurationsdateien, falls manuelle Änderungen notwendig sind.
Client-Konfiguration
Beim Starten des Clients wird eine Verbindung zum Flugsimulator gesucht und wenn dieser gestartet ist, aufgebaut. Danach wird das entsprechende USB-Gerät gesucht. Informationen über den Status sowie die geladene Konfigurationsdatei werden im Konsolenfenster des Clients angezeigt.
Ohne Lizenzdaten startet der SimConnect-Client für 10 Minuten im Demo-Mode.
Konfigurationsvariablen
Üblicherweise werden die Konfigurationseinstellungen für die hardwarebasierten Clients mit dem Programm AP-DeviceCFG modifiziert.
Für die Clients GaugeControl und ITRA-Modules/NAVSTACK können die Lizenzdaten hier eingegeben oder im Lizenz-Abschnitt der Konfigurationsdatei eingetragen werden, bei den anderen Clients müssen die Lizenzdaten im zugehörigen Abschnitt der Konfigurationsdatei eingetragen werden.
Für das TFT-Interface siehe weiter unten.


AP-Radio bedarf standardmäßig keiner Konfiguration. Wenn anstelle der COMM2 die OBS-Anzeigen gewünscht werden, dann setzen Sie im folgenden Abschnitt den angegebenen Wert:
[RADIO]
LICENCE_NAME=Lizenz-Name
LICENCE_NUMBER=Lizenznummer
COMM2_MODE=1
AP-Autopilot bedarf keiner Konfiguration, es gibt aber einige Konfigurationsvariablen für spezielle Geräte-Varianten
[AUTOPILOT]
LICENCE_NAME=Lizenz-Name
LICENCE_NUMBER=Lizenznummer
AUTO_HDG= {0,1} bei Verlust des VOR1-Signals das HDG-Hold aktivieren
BC_LOC=   {0,1}  Backcourse oder Localizer
DME_QNH=  {0,1}  DME- oder QNH-Anzeige auf 6.Display
QNH_4=    {0,1}  5- bzw. 4-stellige Anzeige des QNH
AP-Navstack V.1 ist der Client für das Navstack Version1 mit ActivePanel-Baugruppen (Drehregler für Helligkeitssteuerung). Die Einstellmöglichkeiten sind wie im Handbuch beschrieben:
[MODULES]
LICENCE_NAME=Lizenz-Name
LICENCE_NUMBER=Lizenznummer
XPDR_CODE= -> vierstelliger Code
AUTO_HDG= {0,1}
ADF_STBY= {0,2}
Die Eingabe der Lizenzinformationen kann auch über das Programm AP-DeviceCFG erfolgen. Dann sollten die entsprechenden Zeilen auskommentiert bleiben.
ITRA-Modules / AP-Navstack V.2
Der Client ist standardmäßig für die Verwendung der Module ADF und XPDR eingestellt, welche beim ActivePanel-NAVSTACK V.2 verwendet werden. Für die Verwendung der RMP-/MFP-Module (meist im ITRA-MODULES System) müssen Sie diese aktivieren, da diese die gleiche Anzeige-Adresse verwenden, wie das ADF-/XPDR-Modul:
[MODULES]
LICENCE_NAME=Lizenz-Name
LICENCE_NUMBER=Lizenznummer
RMP_ENABLE=1
MFP_ENABLE=1
XPDR_CODE= -> vierstelliger Code
AUTO_HDG= {0,1}
ADF_STBY= {0,2}
Die Eingabe der Lizenzinformationen kann auch über das Programm AP-DeviceCFG erfolgen. Dann sollten die entsprechenden Zeilen auskommentiert bleiben.
Alle weiteren Einstellungen können wie im Handbuch beschrieben verwendet werden.
Bei den COM-Anzeigen wird der Dezimalpunkt an der letzten Ziffer dazu verwendet, um die 5kHz-Stelle zu signalisieren, die als Zwischenstufe bei den 8,33kHz-Kanälen verwendet wird.
ITRA-GaugeControl
Die Vorzugseinstellungen sind für das TFT1PROP programmiert.
[GC_LICENCE]
LICENCE_NAME=Lizenz-Name
LICENCE_NUMBER=Lizenznummer
Die Eingabe der Lizenzinformationen kann auch über das Programm AP-DeviceCFG erfolgen. Dann sollten die entsprechenden Zeilen auskommentiert bleiben.
Für z.B. das TFT2PROP müssen die Einstellungen entsprechend angepasst werden:
[SWITCHES]
FUELTANKSEL=2   (X-FEED)
MASTERALT=2     STARTER=2
[ENCODER]
GAUGE_5=1       (OBS1 am HSI-Instrument)
GAUGE_6=2       (OBS2)
Weitere Informationen zu den Variablen befinden sich in den Handbüchern zu den Geräten.
Ergänzend dazu wurde für den Schalter PanelLight der Wert 2 zugefügt. Dieser bewirkt die Aktivierung des PanelLights am TFT-Panel direkt durch den Schalter unabhängig von der Einstellung der Variablen im Flugsimulator.
PANELLIGHT=2
TFT-Interface
Das Programm überträgt Daten über das Netzwerkprotokoll TCP/IP zur ITRA-Panel-Software. Die Konfigurations-Einstellungen erfolgen über die Datei ITRA_TFT1.cfg. Die Datei kann mit einem Editor oder mit dem Programm TFT-InterfaceCFG, wie im Handbuch zur Panel-Software beschrieben, geändert werden. Für den Betrieb ist eine eingerichtete funktionsfähige Netzwerkschnittstelle notwendig, auch wenn alle Programme auf einem PC laufen.


Hier werden auch die Lizenzdaten für den SimConnect-Client TFT-Interface eingetragen.
Für erfahrene Benutzer:
Jede Client-Verknüpfung kann durch Hinzufügen eines Konfigurationsdateinamens an das Ende des Verknüpfungsziels mit einer separaten Konfiguration ausgeführt werden. Die angegebene Konfigurationsdatei wird erst im aktuellen Programm-Pfad und dann im oben angegebenen Applikations-Datenpfad für die SimConnect-Clients gesucht.
SimConnect Clients FS2020 (english)
System Overview
SimConnect is an interface developed by Microsoft for communication of external programs with the flight simulator. The SimConnect server is installed together with the flight simulator.
The SimConnect SDK realizes the access to the simulation variables and the commands can be generated via the event IDs. Thus it is possible with a SimConnect client to send commands to the FS2020 flight simulator with external hardware, to set variables and to query and display the status of variables.
System scheme of SimConnect Clients
The SimConnect client communicates directly with the hardware via USB.
In MSFS2020 the SDK can be installed from the developer mode.
https://www.fsdeveloper.com/forum/threads/2020-sdk-installation-instructions.448405/
System requirements
The SimConnect clients have been developed with the MSFS2020 SDK.
The SimConnect clients can be started directly from the installation folder.
The default location of the SimConnect client configuration files is:
Win10: C:\Users\Benutzername\AppData\Roaming\Sim&IT\SimConnect
This folder is hidden by default.
The configuration files ITRA-ActivePanel.cfg and ITRA_TFT1.cfg can also be located in the installation folder, these are then preferably used.
In addition to the modification with the configuration programs, the configuration files can be displayed and edited e.g. with the editor (Programs → Accessories). A corresponding link to the configuration files is created in the program folder during installation.
Hint: If the SimConnect clients start with an error message on your system, then the current runtime libraries for the program environment must be installed on your system. You can find these via the Microsoft Downloads.
Microsoft Visual C++ Redistributable Packages
Software-Installation
After starting the setup you can change the target folder of the installation and the menu folder of the program group. With Finish the client installation is completed.
After the installation you will find in the program group ITRA SimConnect FS2020 by Sim&IT, which was preferably specified during the installation, the links to the client programs and to the configuration file for changing the configuration variables of the clients.
Client Configuration
When the client is started, a connection to the flight simulator is searched and if it is started, it is established. After that the corresponding USB device is searched. Information about the status as well as the loaded configuration file are displayed in the console window of the client.
Without license data the SimConnect client runs in demo mode for 10 minutes.
Configuration Variables
Usually, the configuration settings for the hardware-based clients are modified with the AP-DeviceCFG.
For the clients GaugeControl and ITRA-Modules/NAVSTACK the license data can be entered here or in the license section of the configuration file, for the other clients must the license data be entered in the corresponding section of the configuration file.
For the TFT interface see below.
AP-Radio does not require any configuration by default. If the OBS displays are desired instead of the COMM2, then set the specified value in the following section:
[RADIO]
LICENCE_NAME=Licence name
LICENCE_NUMBER=Licence number
COMM2_MODE=1
AP-Autopilot does not require any configuration, but there are some configuration variables for special device variants
[AUTOPILOT]
LICENCE_NAME=Licence name
LICENCE_NUMBER=Licence number
AUTO_HDG= {0,1} bei Verlust des VOR1-Signals das HDG-Hold aktivieren
BC_LOC=   {0,1}  Backcourse oder Localizer
DME_QNH=  {0,1}  DME- oder QNH-Display at the 6. Display
QNH_4=    {0,1}  5 resp. 4 digit display of QNH
AP-Navstack V.1 s the client for the Navstack version1 with ActivePanel assemblies (knobs for brightness control). The setting options are as described in the manual:
[MODULES]
LICENCE_NAME=Licence name
LICENCE_NUMBER=Licence number
XPDR_CODE= -> four digit code
AUTO_HDG= {0,1}
ADF_STBY= {0,1,2}
The license information can also be entered via the AP-DeviceCFG program. Then the corresponding lines should remain commented out.
ITRA-Modules / AP-Navstack V.2
The client is set by default to use the ADF and XPDR modules, which are used with ActivePanel-NAVSTACK V.2. For the use of the RMP/MFP modules (mostly in the ITRA-MODULES system) you have to activate them, because they use the same display address as the ADF/XPDR module:
[MODULES]
LICENCE_NAME=Licence name
LICENCE_NUMBER=Licence number
RMP_ENABLE=1
MFP_ENABLE=1
The license information can also be entered via the AP-DeviceCFG program. Then the corresponding lines should remain commented out.
All other settings can be used as described in the manual.
ITRA-GaugeControl
The preferred settings are programmed for the TFT1PROP.
[GC_LICENCE]
LICENCE_NAME=Licence name
LICENCE_NUMBER=Licence number
The license information can also be entered via the AP-DeviceCFG program. Then the corresponding lines should remain commented out.
Für z.B. das TFT2PROP müssen die Einstellungen entsprechend angepasst werden:
[SWITCHES]
FUELTANKSEL=2   (X-FEED)
MASTERALT=2     STARTER=2
[ENCODER]
GAUGE_5=1       (OBS1 at HSI Instrument)
GAUGE_6=2       (OBS2)
Further information on the variables can be found in the manuals for the devices.
In addition, the value 2 was added for the PanelLight switch. This causes the activation of the PanelLight at the TFT panel directly by the switch independent of the setting of the variables in the flight simulator.
PANELLIGHT=2
TFT-Interface
The program sends data to the ITRA panel software via the TCP/IP network protocol. The configuration settings are made via the ITRA_TFT1.cfg file. The file can be modified with an editor or with the TFT-InterfaceCFG program as described in the panel software manual. An established functional network interface is necessary for operation, even if all programs run on one PC.
The license data for the SimConnect client TFT interface are also entered here.
For experienced users:
Each client link can be run with a separate configuration by adding a configuration file name to the end of the link target. The specified configuration file is searched first in the current program path and then in the application data path specified above for the SimConnect clients.
Seiten-Werkzeuge
