Benutzer-Werkzeuge
Inhaltsverzeichnis
SimConnect Client
System design
→ How a client can be started together with the FSX / P3D is described in HowTo SimConnect-Client Autostart.
The SimConnect SDK realizes the access to the simulation variables and commands can be generated via the event IDs. This makes it possible with a SimConnect client to send commands with external hardware to the flight simulator MSFSX, MSFS2020 or P3D, to set variables and to query and display the status of variables. In MSFS2020 can the SDK can be installed from the developer mode.
System diagram of Arduino SimConnect clients

The SimConnect client communicates directly with the hardware via the network protocol UDP.
SDK installation for FSX
In MSFS2020 the SDK can be installed from the developer mode.
System requirements
The SimConnect client can be used with FSX-SP2 and P3D. The prerequisite is a configured network with automatic address assignment (DHCP), so that the Arduino gets a valid IP address. This is done e.g. over the router, which realizes the Internet connection.
The SimConnect clients can be started directly from the installation folder.
The default location of the SimConnect client configuration files is:
Win7 ff: C:\Users\username\AppData\Roaming\Sim&IT\SimConnect
These folders are hidden by default.
The configuration file Avionics-Panel.cfg can also be located in the installation folder, which is then preferably used.
The configuration file can be viewed and edited e.g. with the editor (Programs → Accessories). A corresponding link to the configuration file is created during installation in the program folder.
There is also the ability to set up the automatic startup of the SimConnect clients with the flight simulator.
Hint: If the SimConnect clients start with an error message on your system, then the current runtime libraries for the program environment must be installed on your system. These can be found on the Microsoft Downloads.
Microsoft Visual C++ 2010 SP1 Redistributable Package (x86)
Visual C++ Redistributable Packages für Visual Studio 2013
Software installation
Client-Setup FSX
Client-Setup FS2020
After starting the setup, you can change the destination folder of the installation and the menu folder of the program group. Finish completes the client installation.
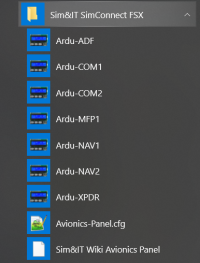
After the installation you will find the links to the client programs and to the configuration file for changing the configuration variables of the clients in the program group Sim&IT SimConnect, which was preferably specified during the installation.
The COM1 client runs without any limitation. The other clients are running without a license for ca. 10 minutes.
Client-Konfiguration
Configuration variables
Each Arduino frequency module has its own section in the configuration file.
[COM1], [COM2], [NAV1], [NAV2], [ADF], [XPDR], [MFP1], [NAVCOM1] and [NAVCOM2].
Each section has the following variables:
ARDU_PORTto define the port of the receiving device if standard port can not be usedRECV_PORTto define the port on the PC, if standard port can not be used
The changed ports must also be defined in the Arduino sketch.
LICENCE_NAMEfor license nameLICENCE_NUMBERfor license number
The ADF Modul has the variable:
STANDBY= {0 , 1}to define the standby behaviour. If no standby has been defined in theaircraft.cfgfor ADF, then the variable must be set to0. Then the encoder changes the active frequency. With the setting1the standby frequency is changed. See also Standby-Frequenzen im MSFS
The Transponder module has a variable:
XPDR_CODE= → four digit codeto define the code at the start of the panel, default is1200
The Multi Function Panel has the variables:
START_DISPLAY= {0 … 5}to define the display at system startup, default is1= NAV1XPDR_CODE= → four digit codeto define the code at the start of the panel, default is1200
There is a section for all [NET]
INTERFACE_INDEXfor defining the network adapter if there are several in the system- use the program
Show the Netindexor the following command wmic nicconfig where IPEnabled=true get caption,index, interfaceindex, ipaddress

